
Congratulations! You’ve got your WordPress website installed. Now…how the heck do you use the WordPress admin dashboard to manage your brand new site? The WordPress admin can be a little overwhelming if you are seeing it for the first time, there are lots of menu items, links, icons and settings which control all the aspects of your website. Despite that, it’s actually pretty easy to learn how to manage your site using the dashboard – you just need to take a little time to find out what each area does and see the settings you can change and what effect they have on your site.
In this post, we’ll give you a detailed guide to the WordPress admin dashboard, covering every single menu option that’s available to you. By the end, you should know everything there is to know about the WordPress admin dashboard.
Let’s get started!
How to Access Your WordPress Admin Dashboard
Let’s start at the beginning:
How to actually access your WordPress admin dashboard. By default, you can always access the WordPress dashboard by appending “wp-admin” to the end of your main WordPress URL.
Most of the time, this means that you can access your dashboard at:
yourdomain.com/wp-admin
With that being said, if you installed WordPress in a subfolder of your main domain name (like “yourdomain.com/wordpress”), you’ll need to append “/wp-admin” to that specific folder to access your dashboard.
When you access that URL, you’ll see your dashboard summary screen (though you might need to log in to your WordPress install before you can see it).
Your WordPress admin dashboard has a number of parts, all accessible by the menu options on the left-hand side of your screen:
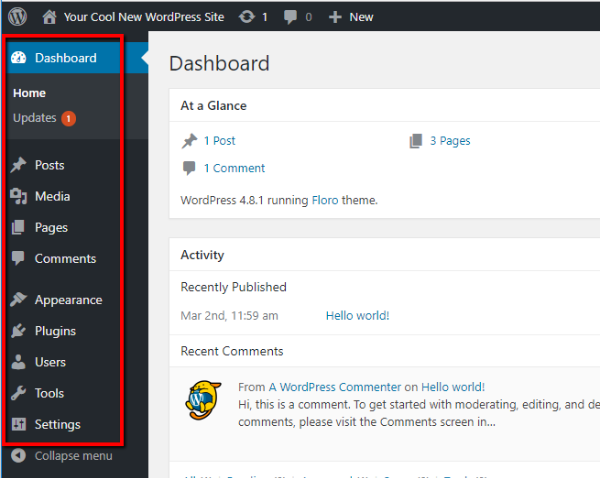
Let’s go through what each section lets you do…
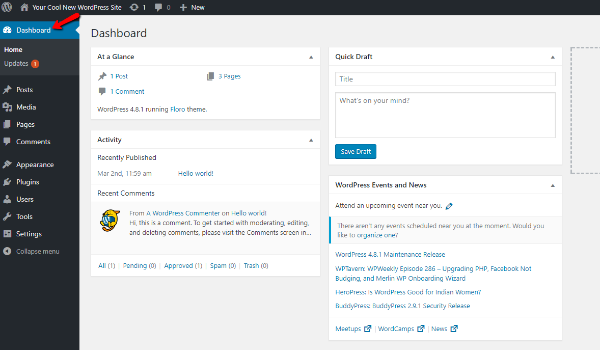
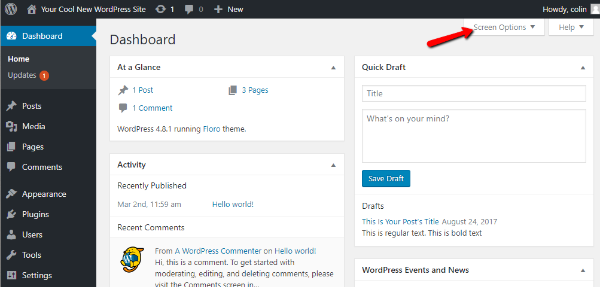
A Look At Your Dashboard Summary Screen
By default, the main dashboard area shows you a broad overview of your site and its activity, as well as some information about upcoming WordPress events and news:
Honestly, you probably won’t spend that much time in this interface. Instead, you’ll spend most of your time using more specialized parts of your WordPress admin dashboard.
Still, this overall look is helpful for seeing things “at a glance”, and some plugins will add helpful “widgets” to this screen.
One area that is especially important is the Updates submenu. If you need to update your WordPress software, plugins, or themes, a red number will pop up indicating how many updates you need to perform:
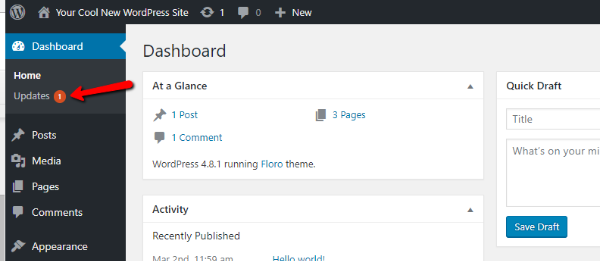
To automatically update your site, you can click on the Updates link and run updates directly from that dashboard area:

Creating and Managing Posts and Pages
Moving on from the main dashboard area, let’s get to the core functionality of most WordPress sites:
- Posts and pages
These two types of content are the default ways in which you can create content for your site. Posts are best for blog post style content, while pages are better for more static content.
To create a new post or page, all you need to do is go to Posts → Add New or Pages → Add New:
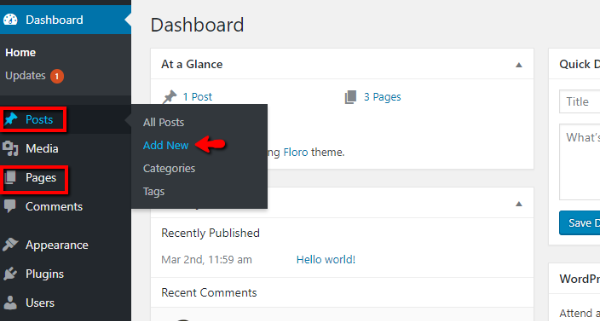
Then, you’ll be in what’s called the WordPress Editor.
How the WordPress Editor Works
The WordPress Editor is where you can actually enter the text content for your post or page, add images, choose categories, and more.
The main editor area is something called WYSIWYG (what you see is what you get). That means it functions similarly to how most word processing programs work.
For example, if you want to make text bold, you just hit the B button, type your text, and you’ll see bold text:

You can use the other buttons to add even more formatting.
To add images, you can use the Add Media button. And whenever you’re ready to publish your post or page, all you need to do is hit the Publish button.
Managing Your Posts and Pages
Once you publish some posts or pages, you can manage them by clicking on either the main Posts or Pages menu options:
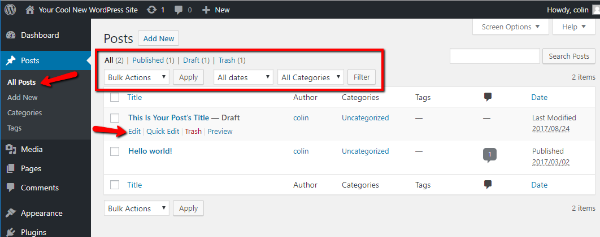
If you hover over a specific post or page, you can quickly access a variety of helpful options. And you can also filter and apply bulk actions to your posts by using the drop-downs at the top of the interface.
These filters might not be especially helpful when your site is brand new. But as your site grows in popularity, they’ll definitely come in handy.
Managing “Media” Aka Images, Videos, and More
In the Media tab, you can manage the images and other media files that you upload to your WordPress site:
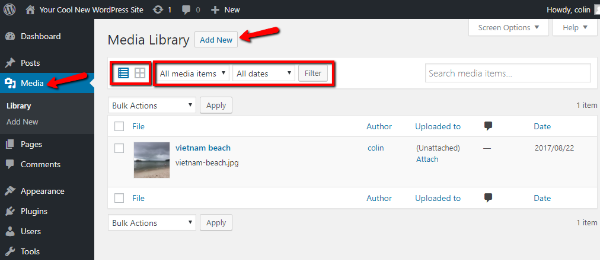
You can switch between different views by toggling the icons. And you can also sort and filter using the drop-downs.
You’re unlikely to use this area of the WordPress admin dashboard very often. But it does come in handy for specific situations, like when you want to delete a certain media file from your site.
You can also add new media files by clicking Add New. But, it’s usually simpler to upload images through the WordPress Editor interface when you’re creating a post or page.
Managing Comments From Your Visitors
In the Comments menu, you can manage comments from your visitors. This tab is especially important because, at least by default, your visitors’ comments won’t show up on the front-end of your site until you manually approve the comments.
You can change this setting in the Settings area (more on that later!), but by default, a user’s first comment always requires manual moderation.
For each comment, you can hover over it to mark it as:
- Approved
- Spam
- Trash
And you can also quickly edit or reply to a comment from the same menu:

Changing How Your Theme Looks And Functions
Next up is the Appearance area. It’s a meaty section of your WordPress dashboard, so it requires a bit of a deeper look than the previous sections.
The Appearance section of your WordPress admin dashboard helps you change everything from:
- What WordPress theme your site uses
- Basic theme styling – colors, layout, etc.
- Widgets – helpful little “content blocks” that add functionality to your theme, usually in its sidebar and/or footer
- Menus – the actual navigation menus used on your site
When you first click on the Appearance menu, you’ll be able to choose which theme your site uses, as well as add new themes (if desired):

Using the WordPress Customizer
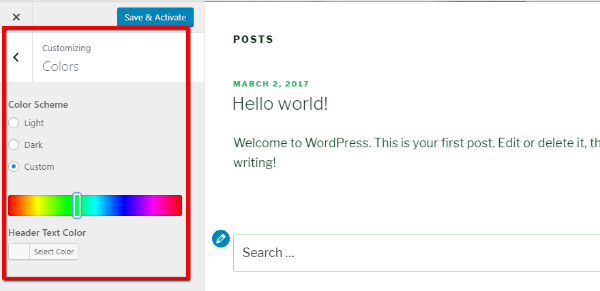
If you click on the Customize option, you’ll launch something called the WordPress Customizer.
If your theme supports it, this is a helpful interface that lets you make changes to your theme without needing to know any code. What’s even more helpful is that you can preview those changes in real-time:
Adding or Removing Widgets
In the Widgets menu, you can add or remove widgets by simply dragging and dropping them between the Available Widgets column on the left and the Sidebar column on the right:
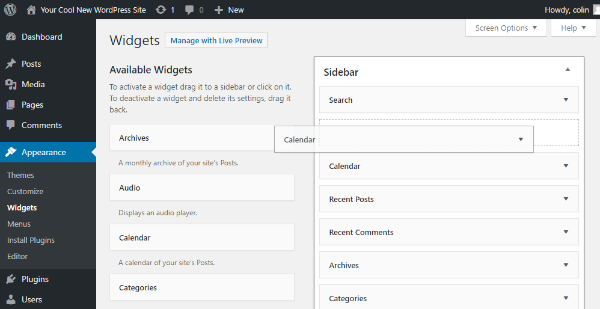
Depending on your specific theme, you might have multiple available widget areas. Each area will be marked by a title.
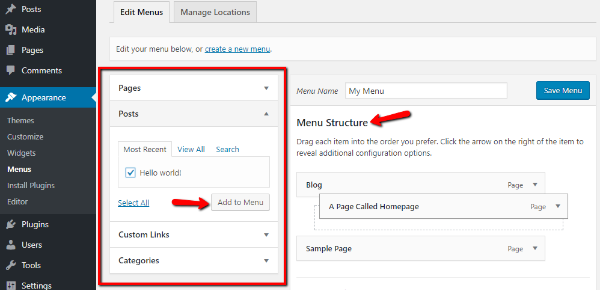
Adding or Removing Menu Items
In the Menus tab, you can add or remove links from the navigation menus used on your site. You can use the options on the left side of the screen to add new menu items. Then, you can rearrange existing menu items by dragging and dropping them:
Adding and Managing WordPress Plugins
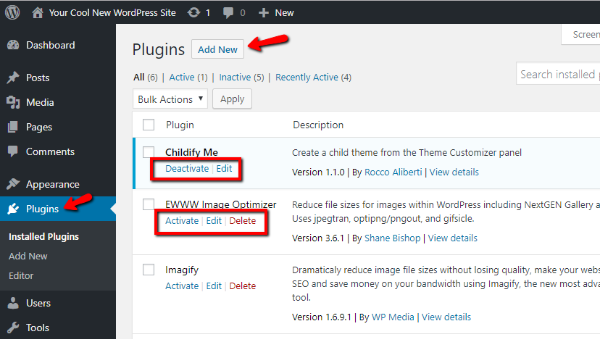
WordPress plugins help you add tons of neat functionality to your site. In the Plugins menu area, you can add new plugins and manage existing plugins.
When you first click on Plugins, you can see a list of all of the installed plugins on your site. You can also activate, deactivate, or delete each plugin from this area:
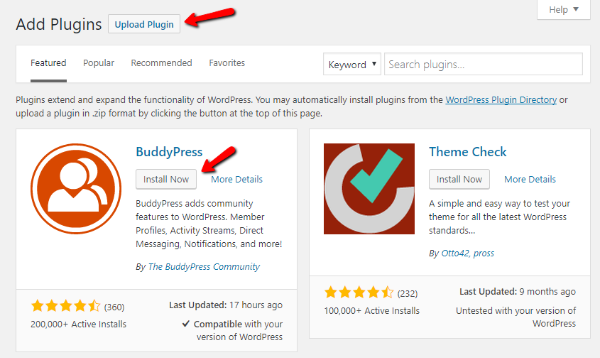
If you click on the Add New button, you can add new plugins by searching the WordPress.org plugin directory or uploading a ZIP file:
Adding and Managing Users
In the Users area, you can view and manage all of the accounts that are registered at your site. If you’re the only person with access to your site, you’re unlikely to ever use this area of the WordPress admin dashboard.
But if you’ll have other authors or contributors, this area is helpful to manage those accounts. You can click the Edit button under each user to manage more settings:

Using WordPress Tools
The Tools area is another menu option that you’re unlikely to use often (or ever). It’s mainly helpful for the ability to import or export your content, which comes in handy if you’re migrating sites.
On a day-to-day basis, though, you probably won’t use this menu option.
Accessing General WordPress Settings
Finally, we get to the last menu area – Settings.
This menu area includes a variety of important settings for your WordPress site. The settings are divided into 6 different tabs. Unfortunately, explaining how to configure each tab would require a whole post of its own.
Rather than do that, I’ll just explain what each tab allows you to do and leave the decision making up to you.
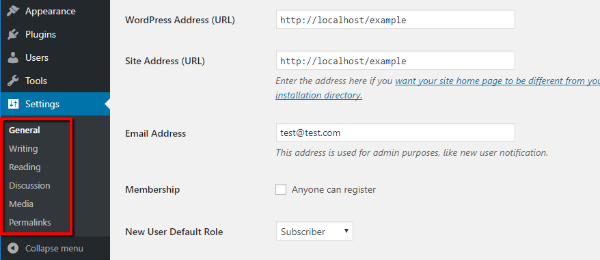
- General – basic settings like site address, time zones, language, date format
- Writing – a fairly unimportant tab that lets you set default post categories and other small settings
- Reading – helps you set a static front page and configure other options about how to display your posts and content
- Discussion – lets you configure options about commenting like whether a comment requires approval
- Media – lets you set the default image sizes used on your site
- Permalinks – VERY IMPORTANT – lets you set the URL structure for your site. We recommend Post name for the structure.
Will Your Dashboard Always Look Like This?
No, your dashboard will invariably change over time.
We gave you a tour of the default WordPress dashboard. But as you add new themes and plugins, those additions will also add new menu items to your WordPress admin dashboard.
For that reason, you’ll almost always pick up new menus and submenus as your site ages.
A Helpful Tip To Get More From The WordPress Dashboard
To wrap things up, let us leave you with one helpful tip to customize your WordPress admin dashboard to your liking.
Every menu inside the WordPress admin dashboard has a Screen Options menu in the top right corner:
If you click this option, you’ll be able to customize how that menu area looks and functions:

As you become more attuned to how you actually use the WordPress dashboard, you can use these screen options to streamline your workflow.
We hope you found this guide to the WordPress admin dashboard helpful, and we wish you the best of luck with your WordPress website!